175
175
Please click here to return to the Gateway 2.0 hub page.
Documents that are submitted need to be reviewed.
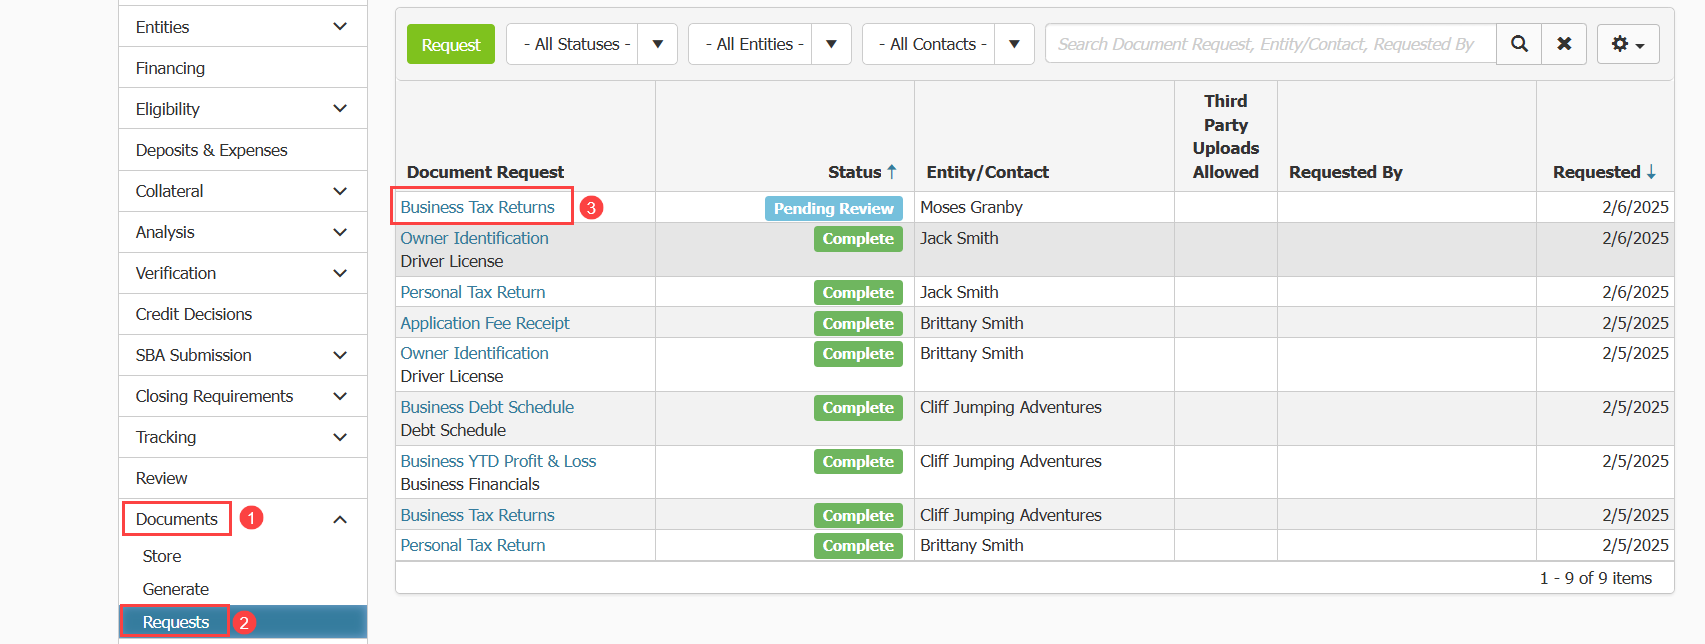
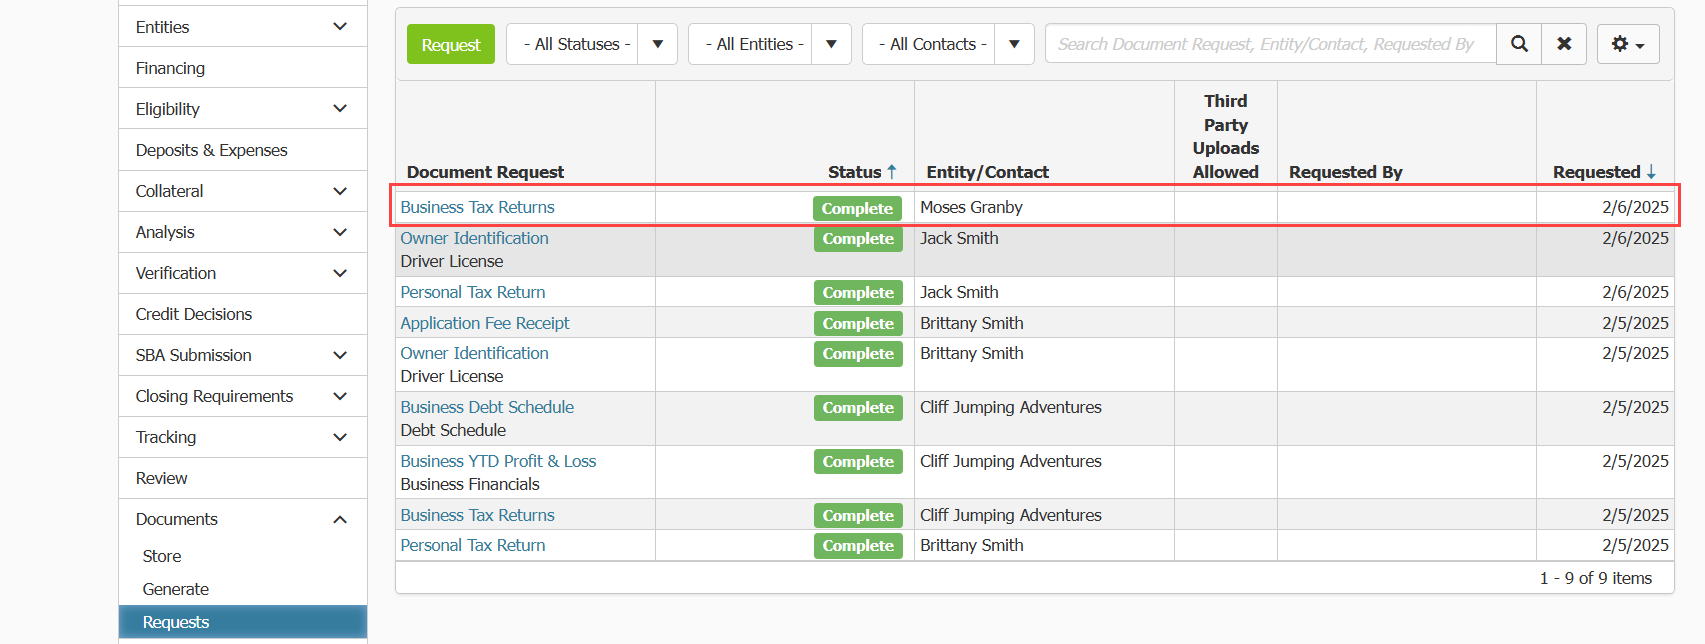
- Click on Documents in the overview menu on the left.
- Click on Requests in the submenu that appears.
- A list of documents that are part of the application will appear. Documents that have been submitted that are pending review will be tagged as Pending Review.
- Click the hyperlinked document name to review the submitted document/documents. A pop up will appear.
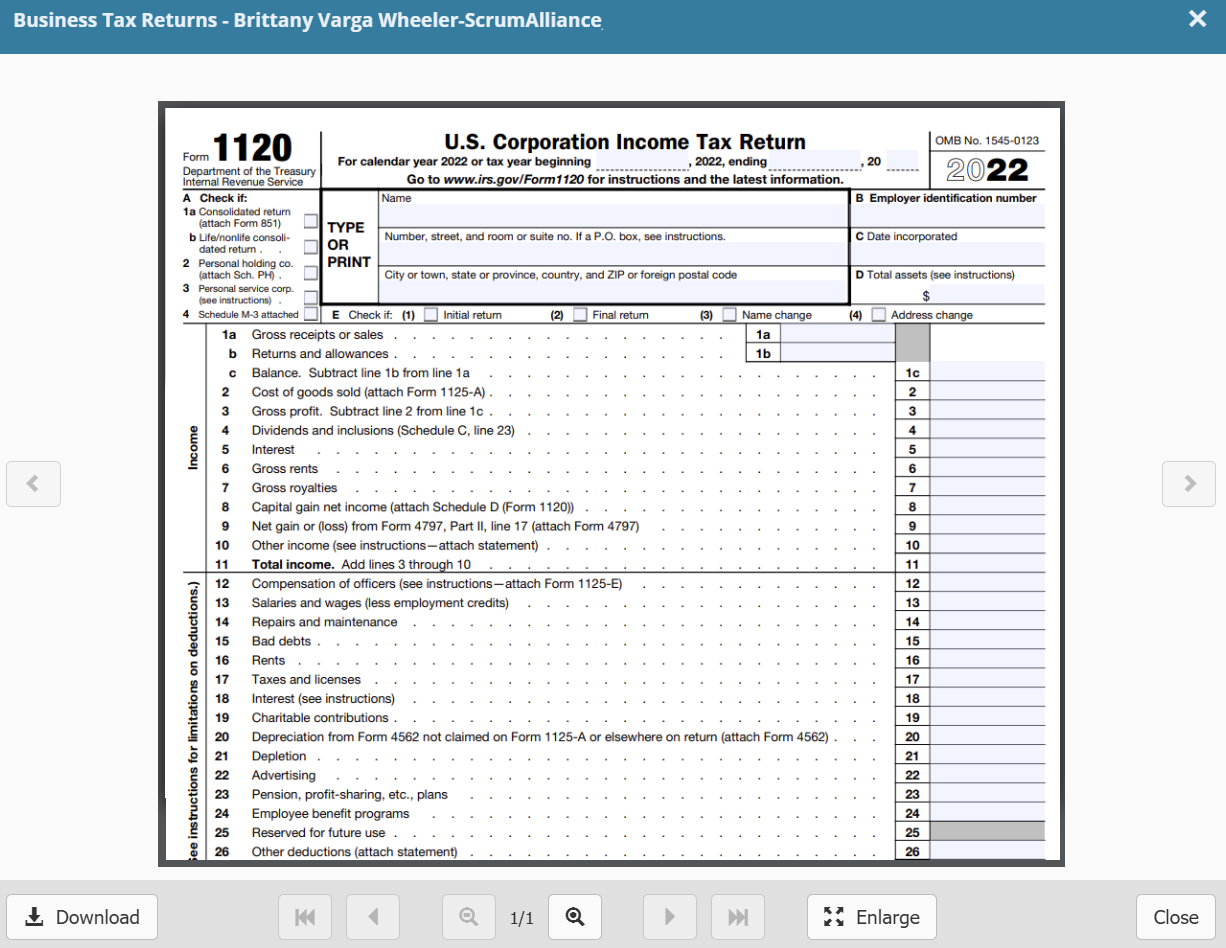
- In the pop up you will see a list of documents submitted by the borrower to fulfill the request. You can review the document in Ventures by clicking on the hyperlinked file name. Alternatively, you can download the documents to your local system to review it using the Download All button.

- If you choose to review it in Ventures, when you click the document name, the pop up will update and display the document.
- You can use the arrow icons at the bottom of the pop up to navigate to the next page, the previous page, the first page or the last page of the document.
- You can scroll up and down the page using the scroll bar.
- The enlarge button will enlarge the preview window to fit your full screen making the document easier to read. Click it again to return to its original size.
- You can use the download button to download the document.
- You can use the magnifying glass icons to zoom in or out of the document.
- Once you review the document click close to return to the first pop up.
Whether you review the document in Ventures or download it and review it on your local machine, you need to choose whether to accept the document and mark it as complete or reject the document by marking it as incomplete.
- In the pop up accessed by clicking on the document request, you will see buttons allowing you to mark the request as complete or incomplete.
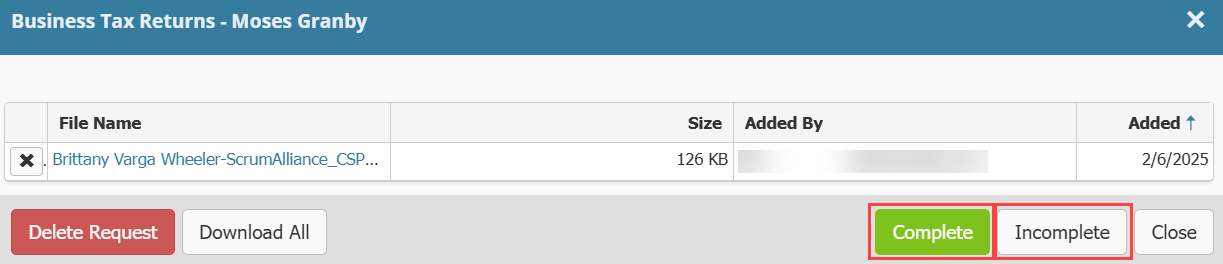
- Clicking Complete will mark that the request has been satisfied. The pop up will disappear. You will see the request marked as complete in the Requests table. Note: If you mark a document as complete, you cannot change it to incomplete. Only mark a document complete once you are satisfied with the submission.
- A copy of the document will be added to the Document storage area. You can access this by clicking on Documents in the overview menu on the left then clicking Store from the submenu that appears.
- To mark the request as incomplete, click the Incomplete button. The pop up will update.
- You will see a field where you can enter your reason for marking the document request as incomplete. Enter a reason then click the Mark Incomplete button.
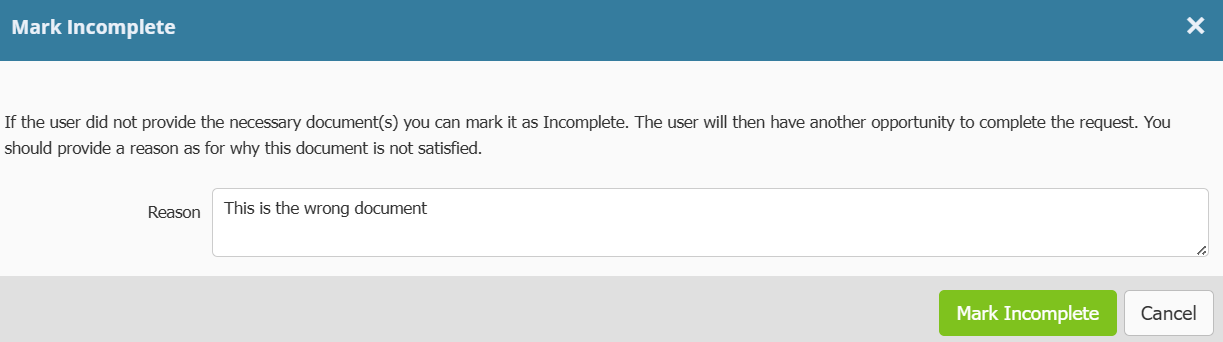
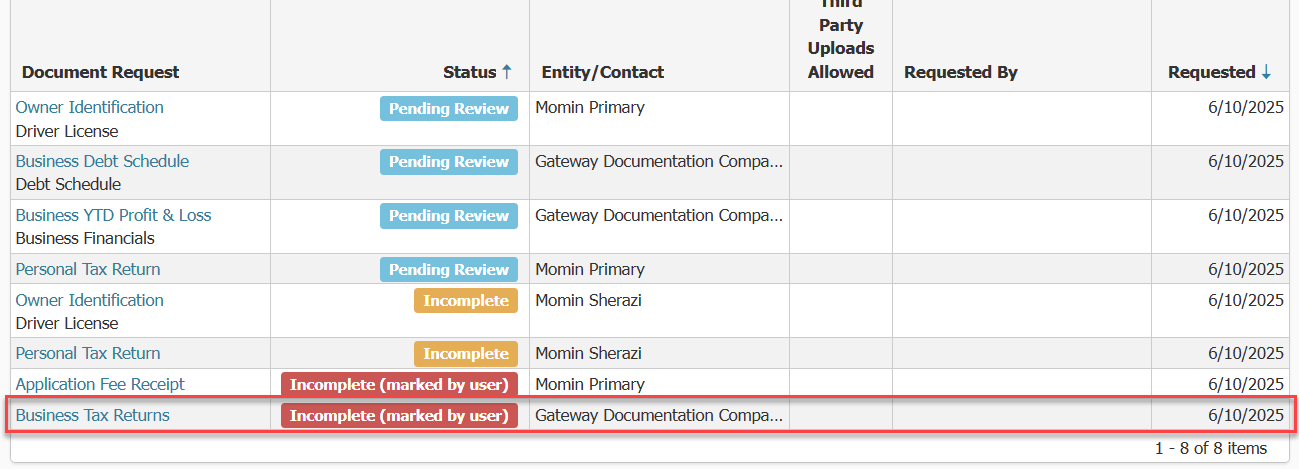
- The pop up will disappear and you will see the table update to mark the request as Incomplete by User. You do not need to send a new request for the document. Borrowers will upload files to the same request as demonstrated below.
- The borrower will receive a notification that indicates documents are missing.

- When they click upload documents, they will see which documents were marked as incomplete.
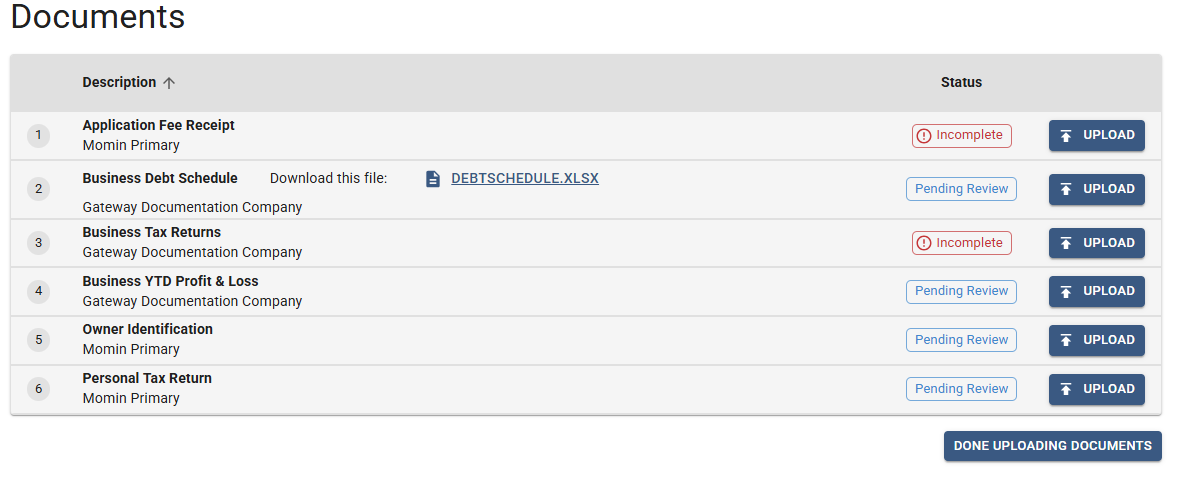
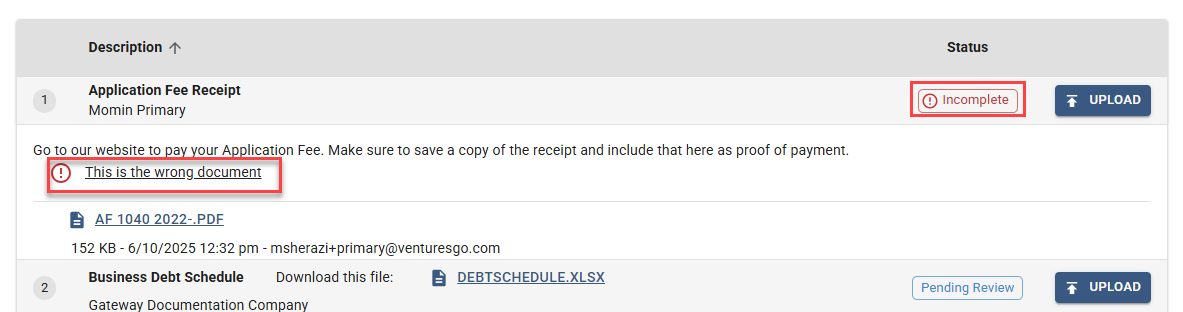
- They can click on the incomplete status to review the stated reason the document was marked as incomplete. They can click upload to submit new documents to fulfill the request.
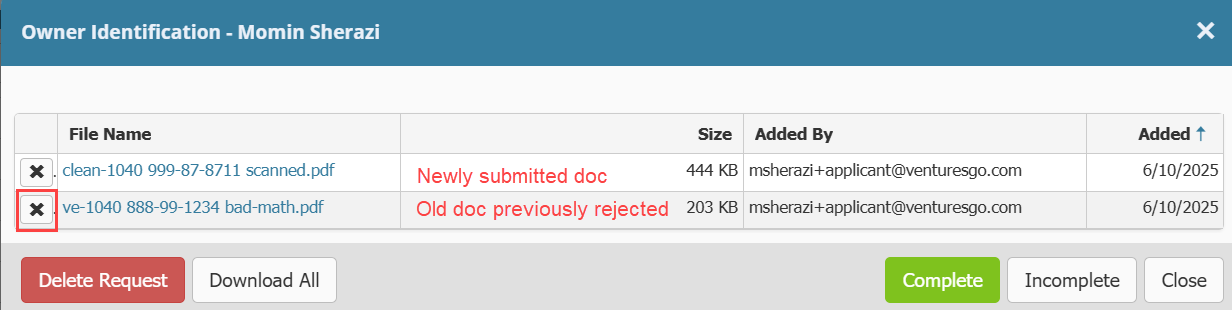
When a document is submitted to a request that was initially rejected, when you click on the request to review it, you will see both the old document and the newly submitted document listed. There may be situations where you want to save both, for example you requested two years of tax returns, but they only submitted one originally, forcing you to mark it as incomplete. If you do not want to save the old document, MAKE SURE YOU DELETE THE OLD DOCUMENT FROM THE REQUEST. If you mark this as complete, both the old, rejected document and the new document that you want to accept will be added to the document store in Ventures.
- Click the X icon next to the document you want to delete.
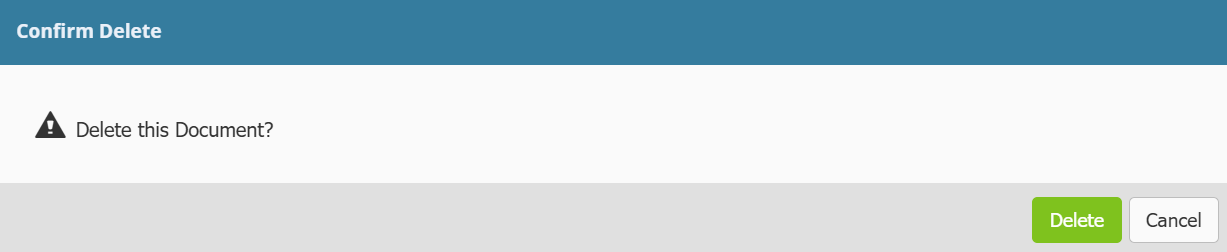
- Confirm you want to delete the old document.
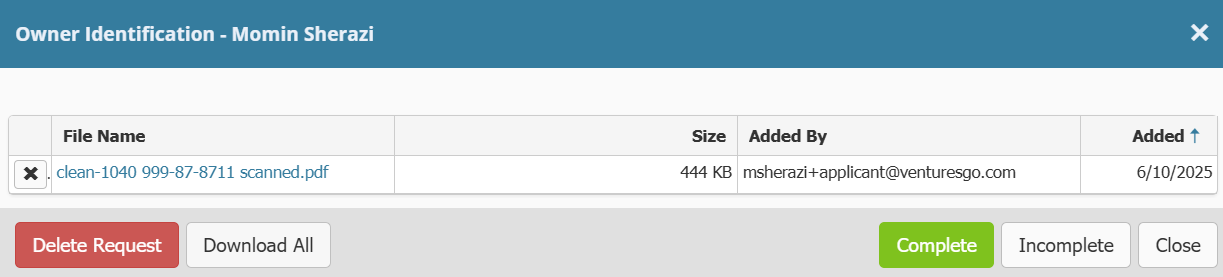
- Once you only see the newly submitted document, you can continue with marking it Complete or Incomplete as needed.
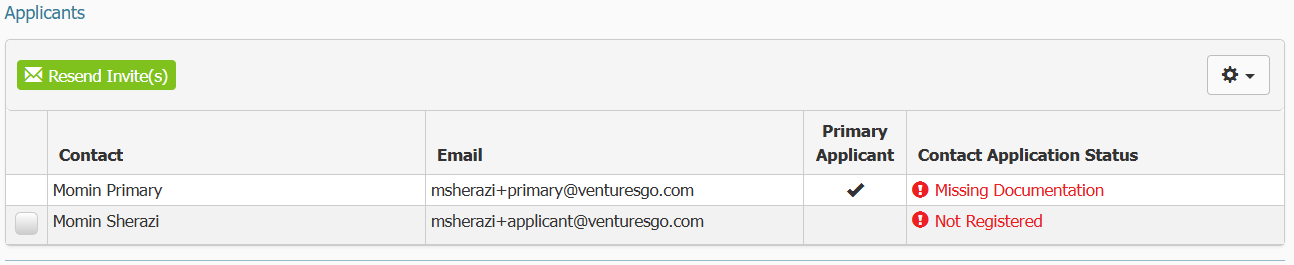
When a document or multiple submitted documents are marked incomplete, the Contact Application Status for the applicant on the Application -> Summary page will update to Missing Documentation till they resubmit any outstanding documents.