
 850
850
The Ticklers menu will show you all ticklers assigned to this specific loan. It allows you to update ticklers assigned to the loan, process individual ticklers related to the loan and it is also one of the pages where you can add a tickler to a loan. This article will cover adding ticklers to a loan. Please click here for the article covering tickler statuses and processing ticklers for individual loans.
You can access the ticklers menu by:
- Clicking on Tracking in the Overview menu of the loan
- Clicking on Ticklers in the submenu that appears
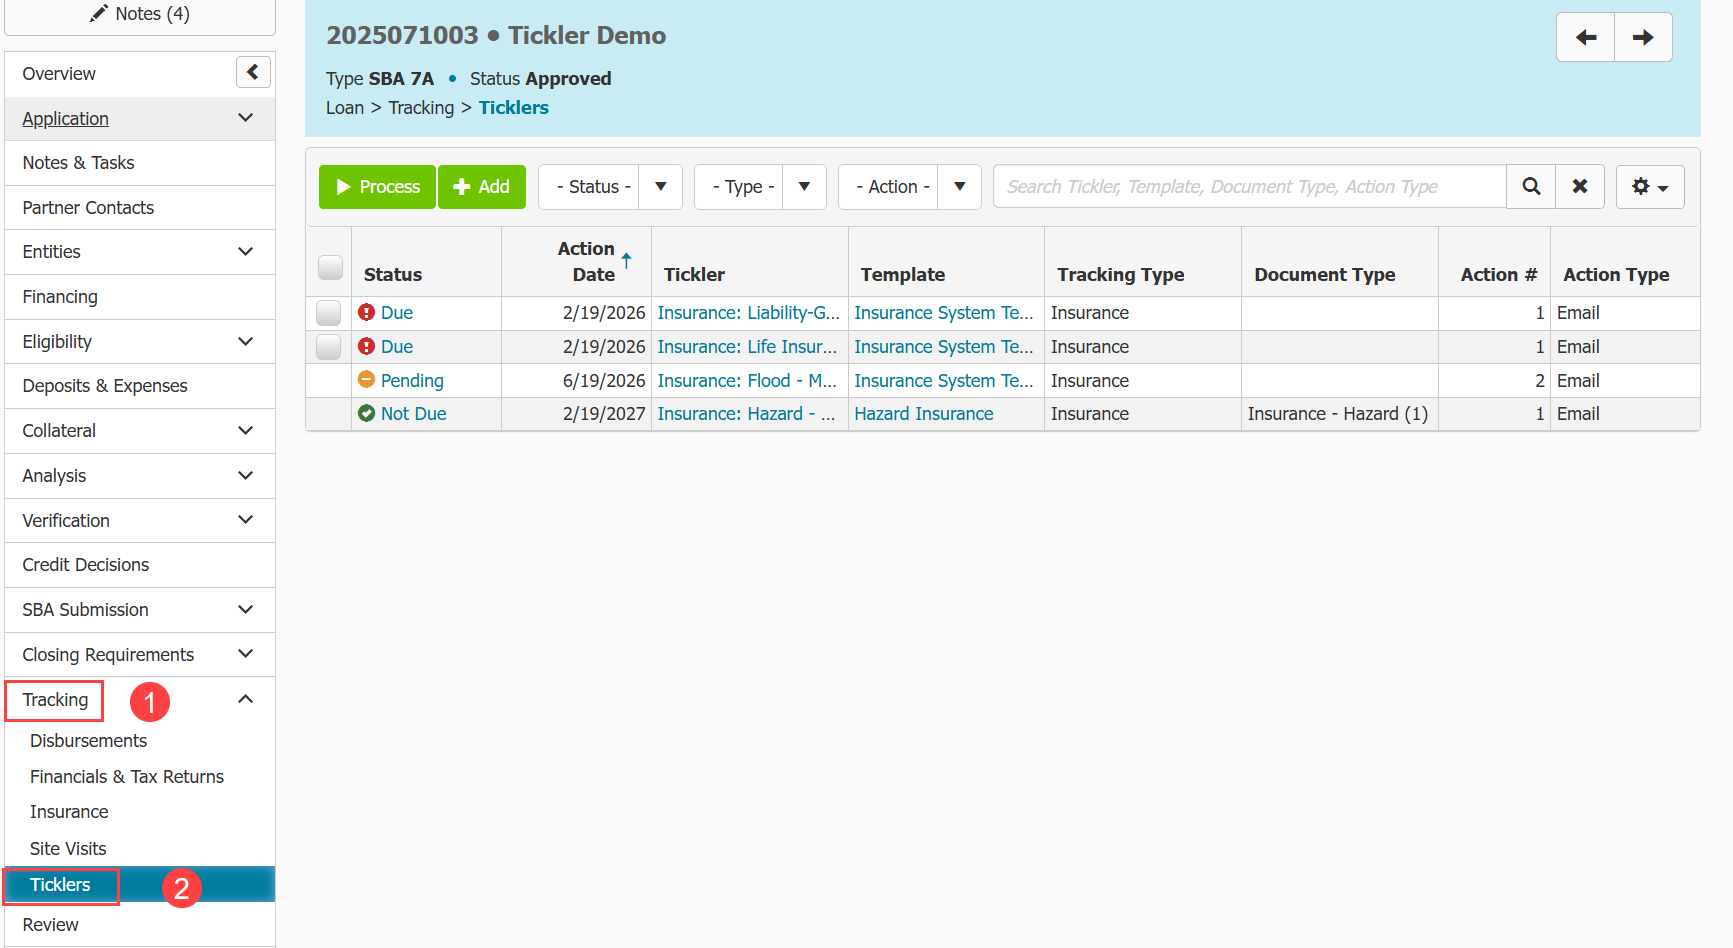
You will see any assigned ticklers listed in the table, along with their status.
- To add a tickler click Add.

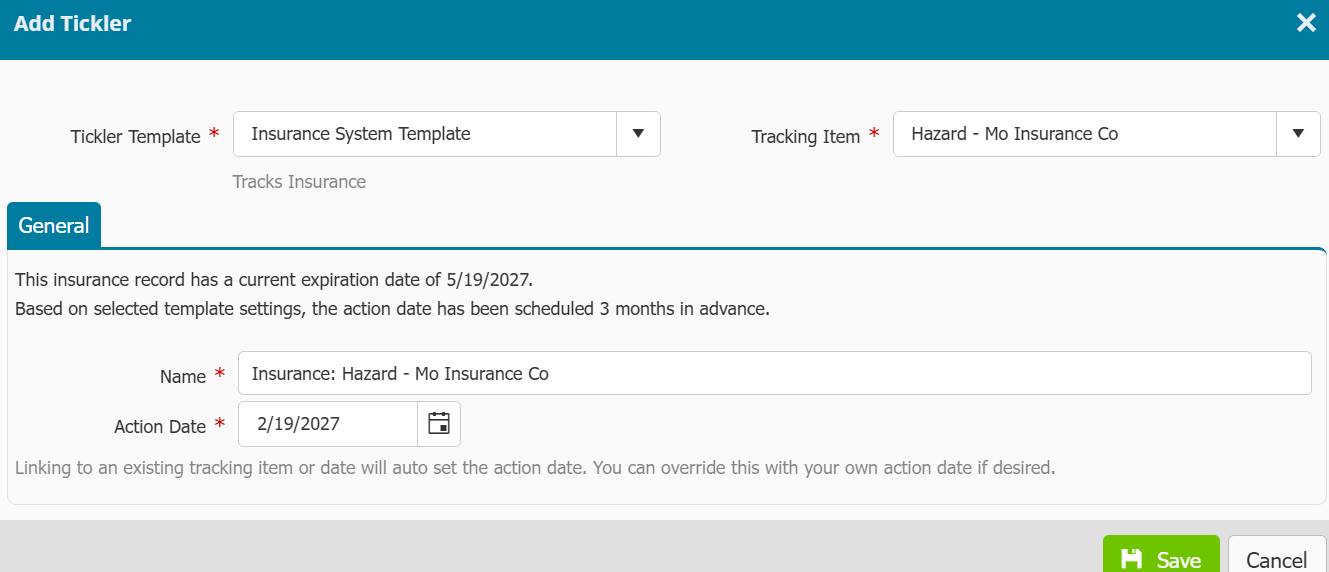
- The Add tickler pop up will appear. Select the Tickler Template from the dropdown menu. Tickler Templates can be created following the instructions here.
You must have items entered for the appropriate tickler template to track for it to be selectable. For example if you do not have any records in the Financials and Tax Returns section, if you select the financials due tickler template, you will receive an error stating there are no tracking items of that type in the loan.
- When you make your template selection, you may see another dropdown menu appear. This will contain options that the template you selected can track. Select which item you want this tickler to track. For example if you select the Insurance tracking template, a field will appear asking you to specify which Insurance that has been marked required (flood, hazard e.g.) this tickler will track.
- Name the tickler, make it as descriptive as possible.
- If the item you have set has a due date, it will automatically fill in the Action Date. You can enter any date in the Action Date field that you wish.
- Click save.
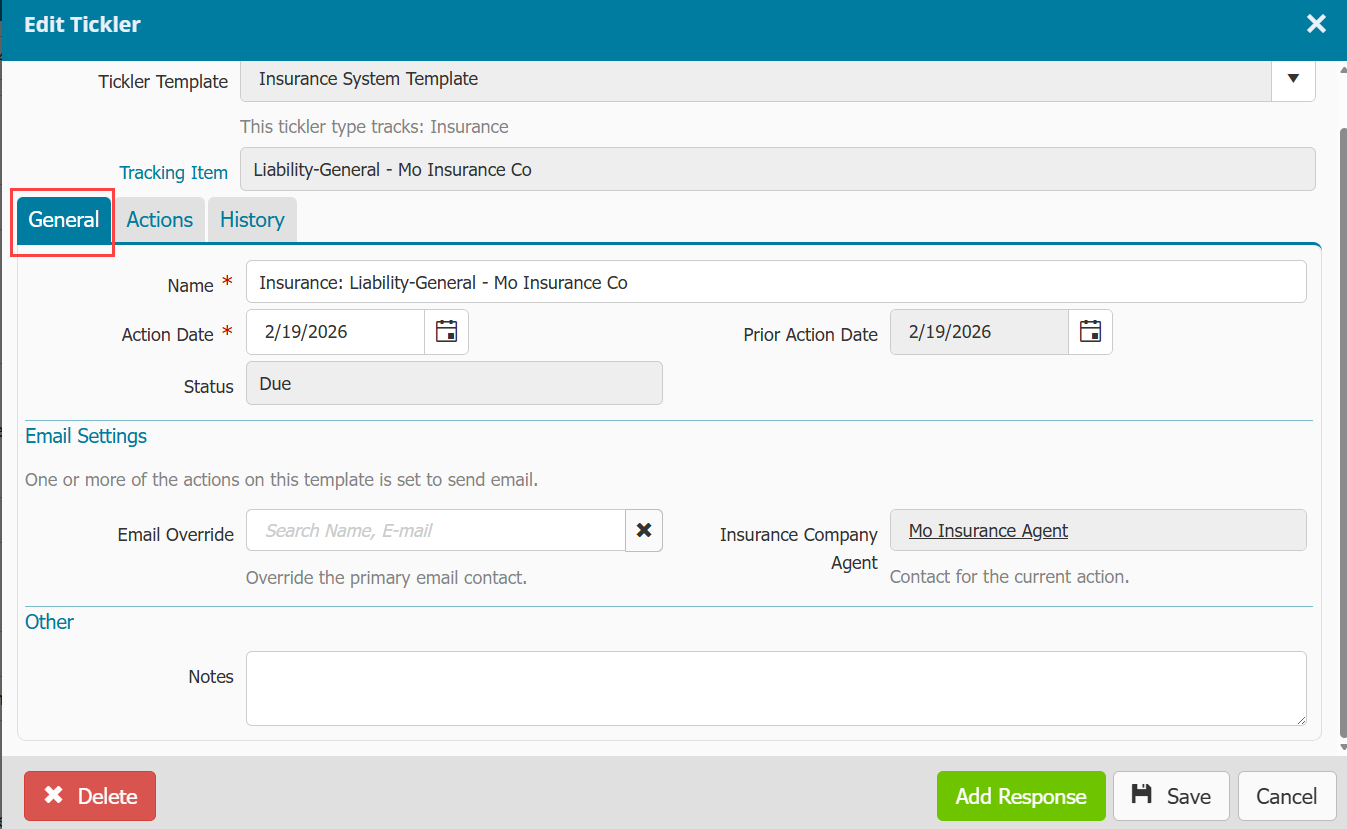
- Next click on the hyperlinked tickler name in the table.
![]()
You can use these options to go through the tickler set up and review what the tickler will do once it is processed. There are also additional options you can choose from here that will affect how the tickler is processed. These steps are optional. If you know your tickler template is set up to your liking, you do not have to follow the steps below.
- On the General tab, you can review the name of the tickler and update the action date.
- You can use the email override field to override the primary email contact listed in the actions tab.
- You can use the notes field to enter any relevant notes regarding the tickler.
The Actions tab reflects the tickler template setup. You will see a number of tabs corresponding to the number of actions set up in the template. If the template is set up to result in an email, you will see an email settings section. If the template is set up for the action to be a phone call, you will see a phone settings area.

In this example the action is an email, so we will go through and ensure the appropriate emails are added to each email settings section for all the actions.
- Click the Actions Tab. Start on tab 1
- Click Add. A pop up will appear.
- Search for the contact who should be receiving the email. If they are not in the system, add them. If the contact does not have an email address on their Virtual card, you will not see an email address listed under their search result. If this is the case, click their name and add the email to the email field of the card and click save. If you have added a contact with no email, you will see a red warning informing you that the email is missing.
- Select the type of email you want the action to send, you can select if you want the recipient to be CC’d, or BCC’d. Click save.

- Go through the tabs for each remaining action and make sure the information is entered correctly in each one. If the Action is a phone call, the steps to add the person who should be called are the same as setting up the email above.

- The Utilities tab allows you to add a response. This is can be used when a tickler is due, but you need to add a response with processing the tickler again. If you click the button, you will be able to set a new notification and due date. You can also mark if the tickler has been completed here.
- The complete button should only be clicked when you are done using the tickler for the particular loan. When clicked, the tickler become inactive and will no longer track or perform actions.

- The History tab will display all actions performed on this tickler along with the user who performed the action, and the time and date stamp of when they did.

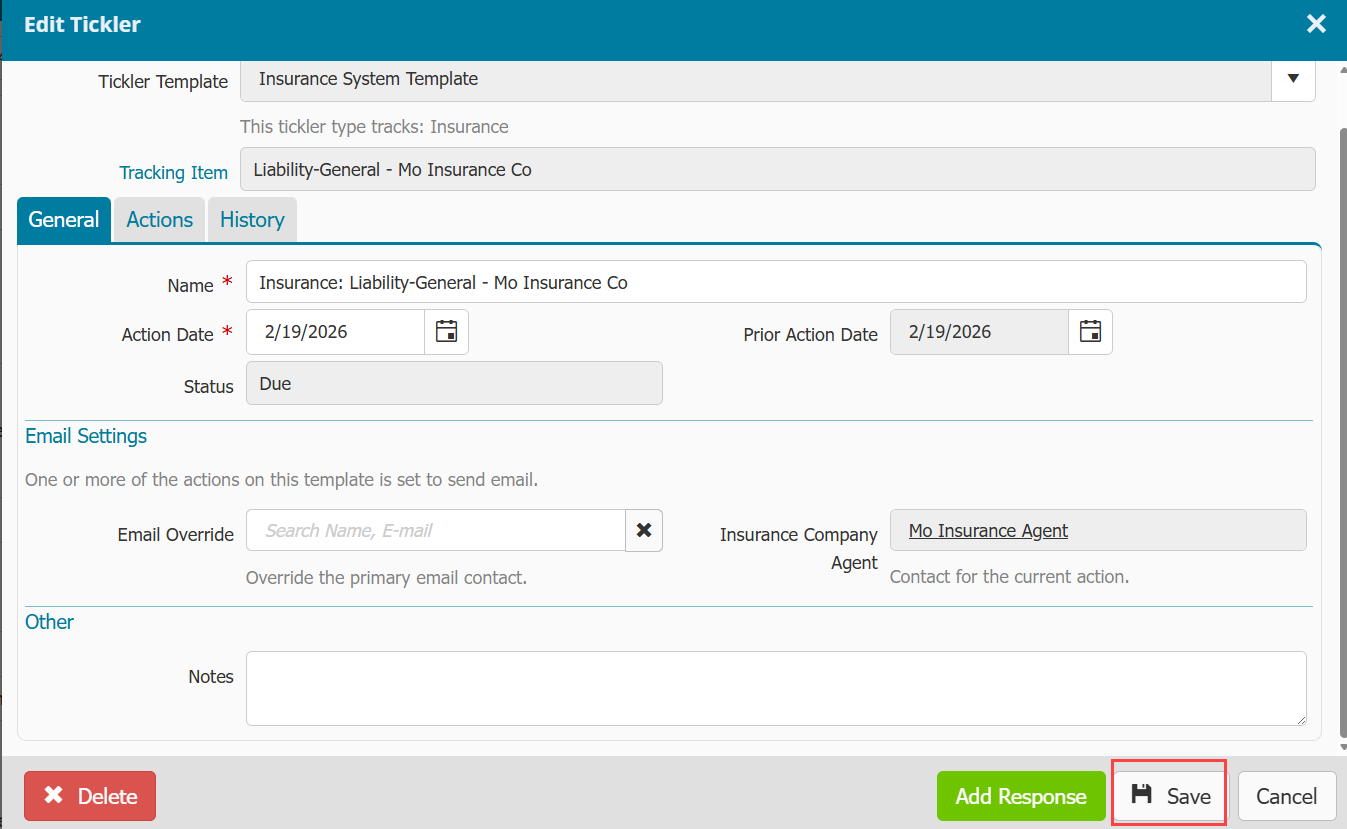
- When you have finished entering information and reviewing it. Click save.
You will return to the Ticklers page in the loan. You should see the tickler you created listed in the table.
- You can delete a tickler by clicking the name of the tickler as seen above.
- In the pop up that appears click delete in the lower left corner of the pop up.
- Confirm you want to delete the tickler by click the delete button.


