Processing Ticklers in Individual Loans

May 27, 2026
 737
737
This article covers processing ticklers in an individual loan file. For instructions on how to bulk process ticklers, please click here.
- Click on Tracking in the Overview page of the loan
- Click on Ticklers in the submenu that appears.
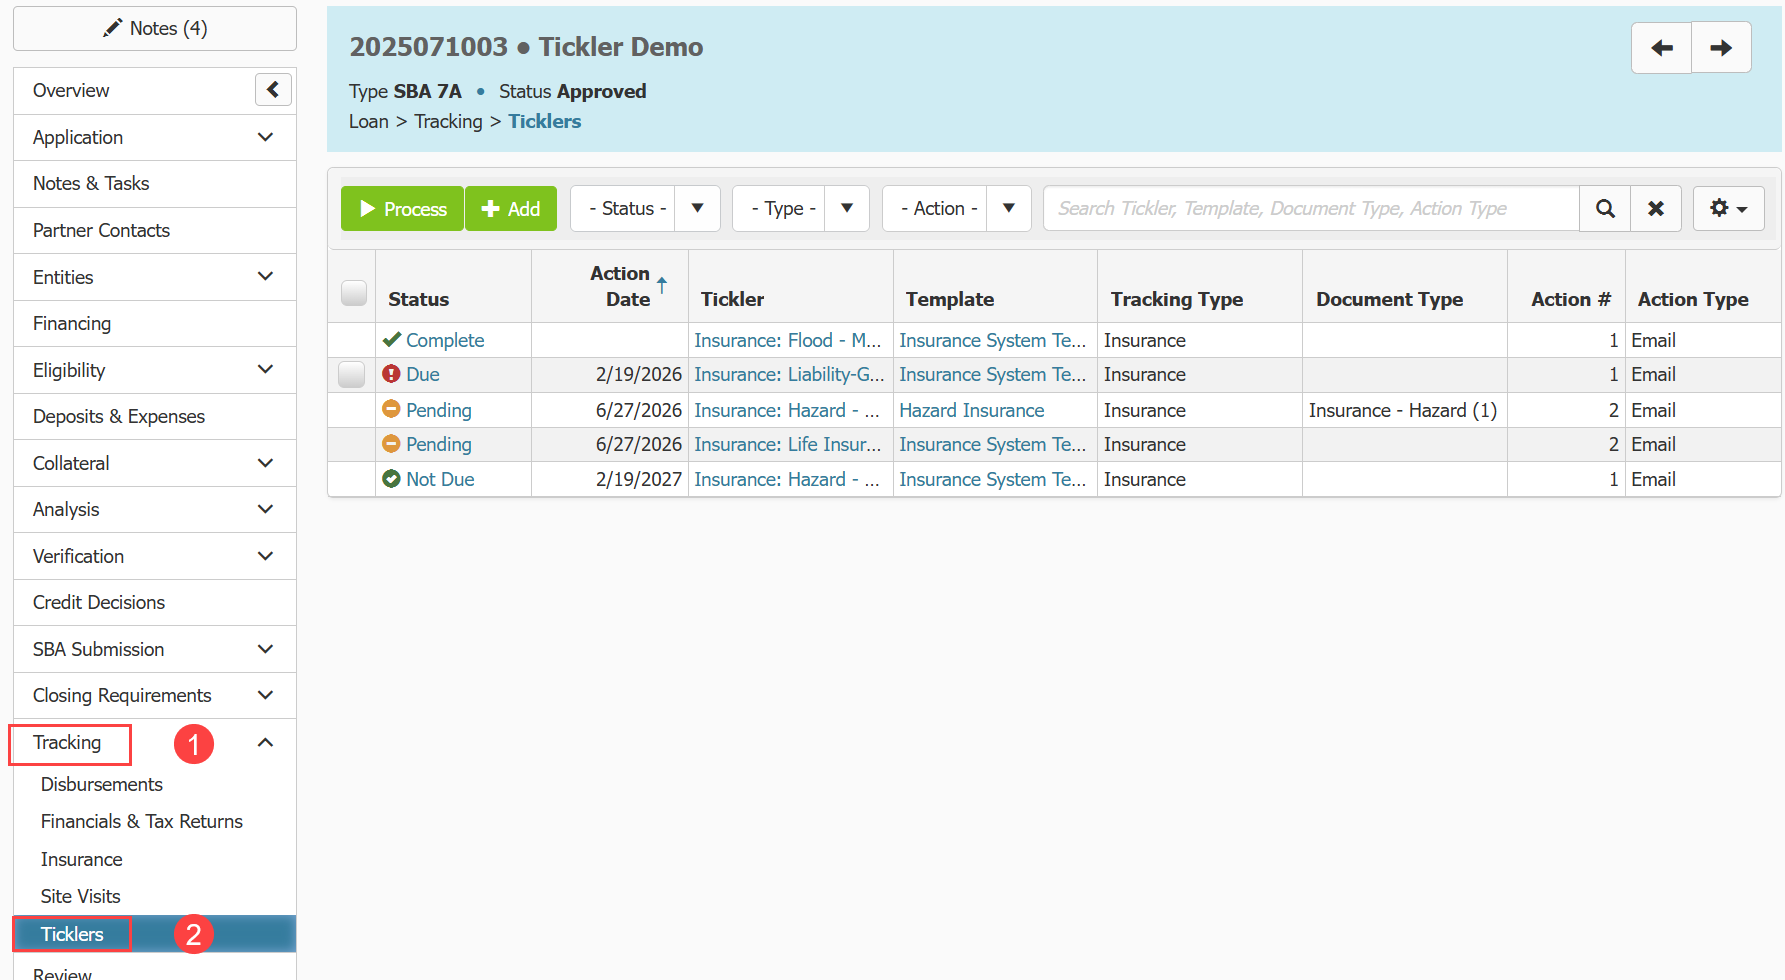
Before you process a tickler, it is important to understand Tickler Statuses as they determine whether the tickler can be processed or not.
- Ticklers with a status of Not Due are not due, or items for them have been received. You cannot process the tickler at the current time.
- Ticklers with a status of Completed are ticklers that have been 100% completed. They will not continue to track or perform actions. You cannot process completed ticklers.
- Ticklers with a status of Pending have tracking items that are due and require you to update the tickler.
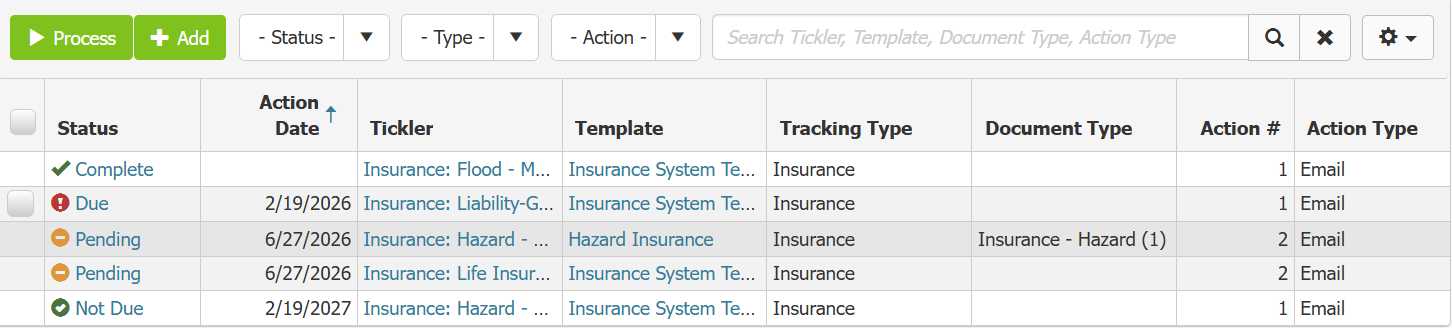
- Click on the status to update the tickler. A pop up will appear.

- In the pop up you update the tickler with a new date for when the item will be needed again. In this case this tickler is tracking insurance, and so we enter a new Expiration date. Based on how the tickler template is set up, the Action Date should automatically update based on the Expiry Date entered. You can always edit the dates as needed. Note: Checking the Completed checkbox will render the tickler inactive. It will no longer continue to track the item it is set up to track. Only use the completed check box when the tickler is no longer need.
- The document section will allow you upload a document to the tickler, and said document will be stored in the document storage area of the loan, with the document type associated with the tickler template assigned to it. For example if we look at the screenshots above, we can see this tickler is set up to assign the document type Insurance-Hazard(1). If a document is uploaded here, it will be assigned that type and stored in the loan's document storage area. If the tickler template does not have a document associated with it, you will not see this section. This section is optional, if you do not have a document, it will not stop you updating the tickler. This does not pull information from the document. All information still needs to be entered manually.
- Click on the status to update the tickler. A pop up will appear.
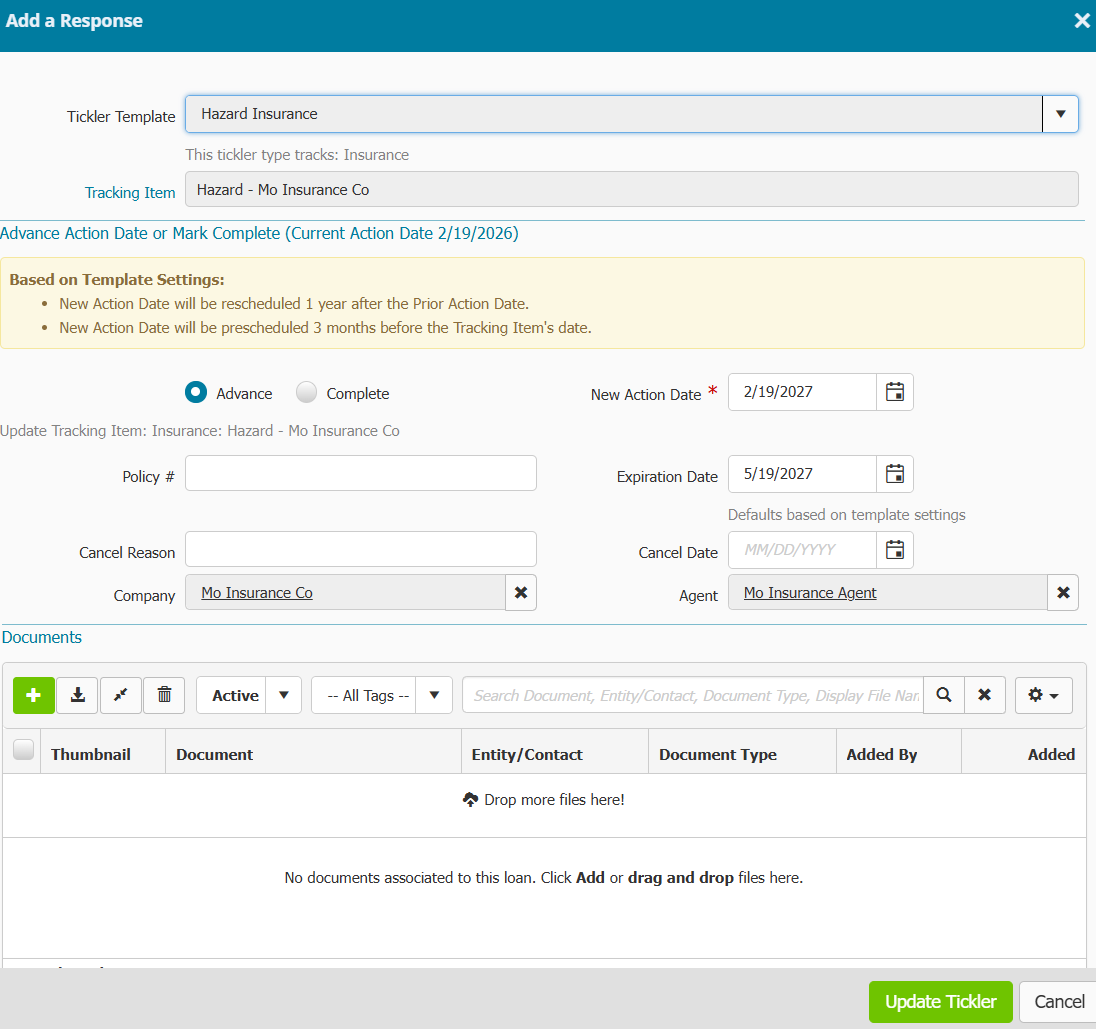
- Click update tickler to update the information. The pop up will disappear and you should see the status of the tickler change from Pending to No Action.
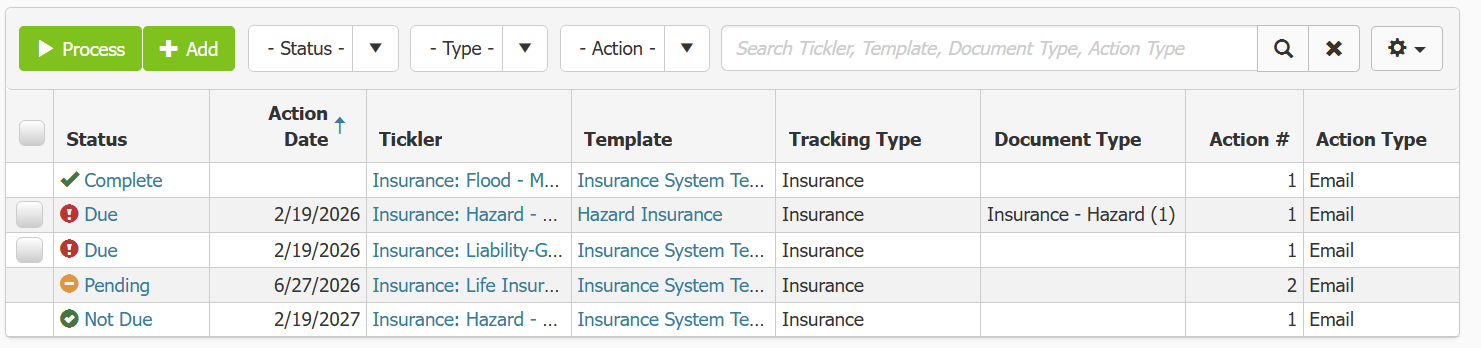
- Ticklers with a status of Due are overdue and the tickler action will be carried out if there is one set.
- You can process multiple ticklers at once by checking the boxes next to them and then clicking the process button.
- To process a tickler individually you can check the box next to it and click the Process button or click on the word Due.
- If the action is set to email, you will see some options to select:
- Preview Mode: Selecting Yes allows you to view the relevant documents associated with the Tickler without Processing/Advancing the Tickler.
- Combine Like Emails: Selecting Yes allows you to send a single email with all documents addressed to the same contact as attachments. For example: if you have an insurance broker/agent that services 5 loans in your portfolio they will receive 1 email with 5 attachments instead of 5 separate emails if this is set to Yes.
- Force Print Mode: Select Yes to download documents instead of email when your action is set to email.
- Format: Select the format in which you'd like to send the document or view the document. (Tip: if emailing a document choose PDF as the format).

- Make your selections and click continue. The tickler will process. You will see a summary explaining whether the tickler process was successful or not and how many emails were created as a result.

- If the action is set to email, you will see some options to select:
If emails are not the action you have set up:
- A pop up will appear with more limited selections from the list above. Make your choices and click continue.

- The tickler will process. You will see a summary of how it processed.
- For phone call actions:
- Click the edit icon in the summary. A pop up will appear with the phone number of the person who needs to be contacted and a space to enter notes regarding the call.

- Fill in information regarding what happened on the call, then click Mark as Complete to mark the call as completed.

- You will return to the previous pop up. You should see a strikethrough the action you marked as complete. Click Ok.

- Click the edit icon in the summary. A pop up will appear with the phone number of the person who needs to be contacted and a space to enter notes regarding the call.
- For internal reminder actions, after you click Due a pop up will appear:
- You will be presented with a selection of options described above in the email section. Make your selection and click Continue. The pop up will change

- Click the edit icon in the summary. A pop up will appear with space for you to enter notes.

- Fill in notes for the reminder if you need to, then click Mark as Complete to mark the reminder as completed.

- You will return to the previous pop up. You should see a strikethrough the action you marked as complete. Click Ok.

- You will be presented with a selection of options described above in the email section. Make your selection and click Continue. The pop up will change
- For phone call actions:

