 445
445
You can import payment information using the import payments feature in Ventures. This allows you to add payment transaction information to a loan you have boarded in payments.
- Click on Payments in the menu at the top of the screen.
- When the Payments page loads, click Actions in the menu on the left. A submenu will appear.
- Click Import Payments File. The import payment page will load.
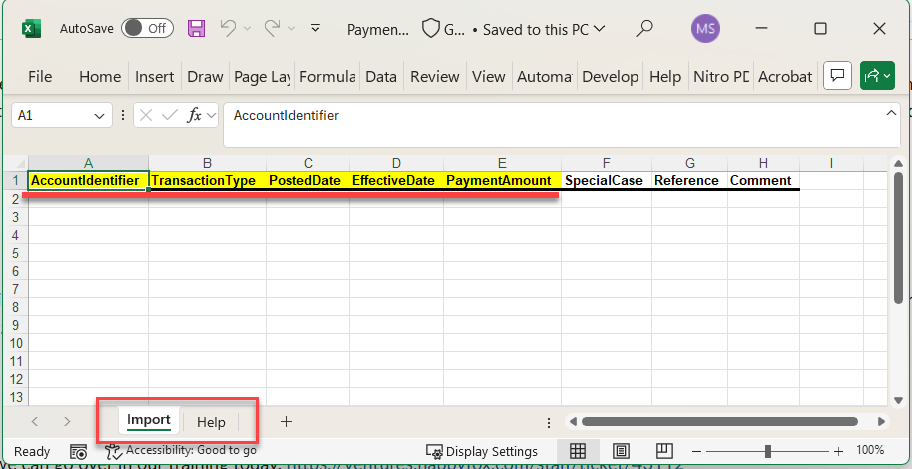
- You will need to set up a template for the import to work. Ventures provides you with a blank template for your convenience. Click the "Download the template here" link. Save the template to your machine and when the download finishes, click on it to access the template file.

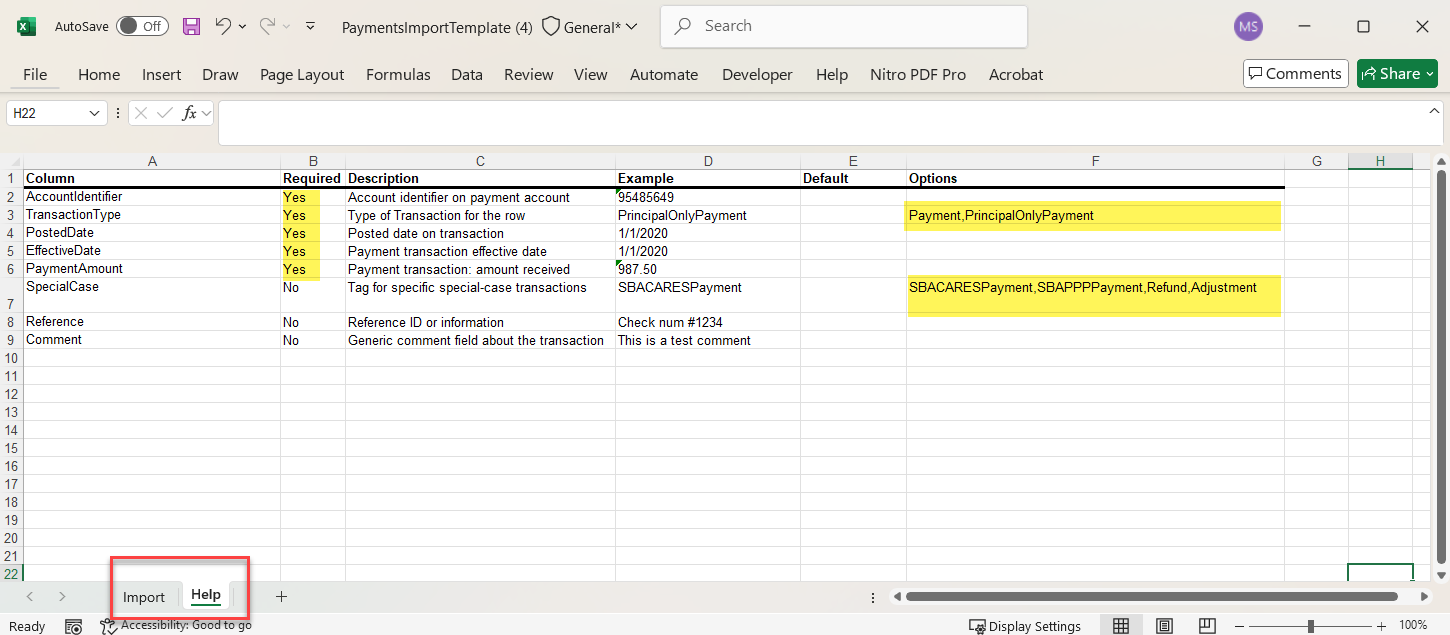
- The template is an excel file that contains two tabs. The Import tab is where you will enter the information you wish to import. Columns that have a highlighted title are mandatory. You can enter as many records as you need, use a new line for each record.

- The second tab is labeled help, it gives you examples of data to enter for each column.

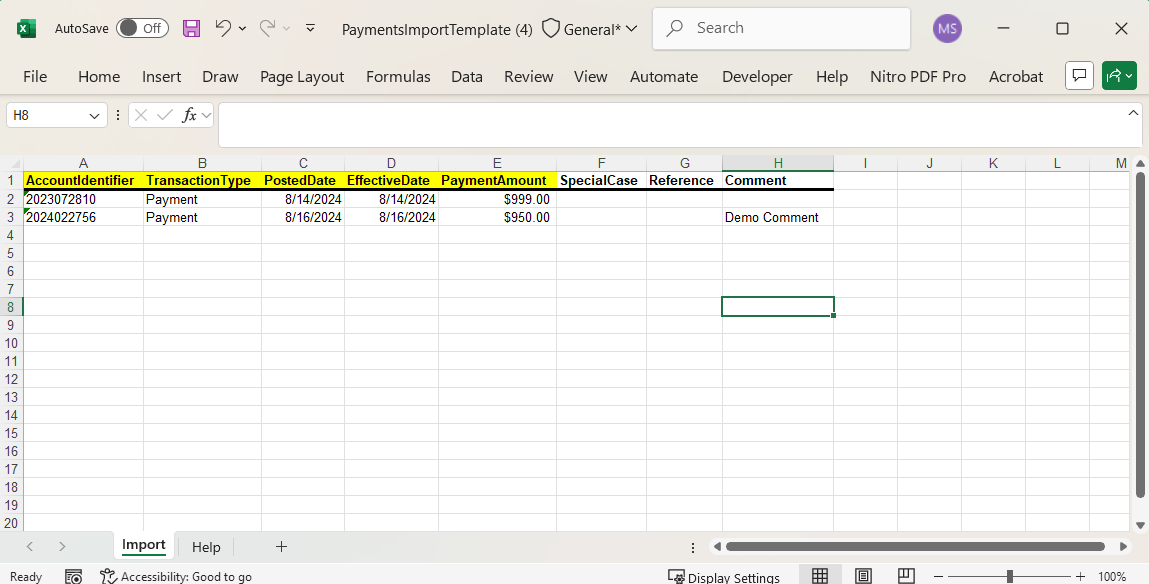
- Go through and fill in the information for each payment you want to import. Make sure you fill in the required columns.

You can find the Account Identifier for a loan boarded in payments in Ventures.
- In the loan, click on Payments in the overview menu on the left for a loan boarded in payments. A submenu will appear.
- Click Loan Details in the submenu.
- The Loan Details page will load. The identifier can be found on the General tab (the General tab should load by default) in the Identifier field.

- Once you have finished filling in the information for the payments you want to import. Save your template.
- Back in Ventures, on the Import Payments Files page, click the Select or Drop Files button and select the filled in template on your local machine, then click open. Alternatively you can drag and drop the filled in template in the area marked "Drop filed here to upload"


- Once the filled in template is uploaded, click the Import button.

- The import will process, you will see a loading bar.

- When the import completes, you will see a summary of what was imported.

You can view a history of what was imported:
In the Payments main menu:
- Click Actions. A submenu will appear.
- Click History.
- Use the filter filed to select "Import Payments File" to display a history of all imported payment files.
- You will see basic information for the import.
- Click the History ID for a popup containing an in-depth look at the import. You can use this to review why an import may have failed.

Successful import:
- For successful imports you will see a list of the records created. The results tab will contains a summary of the import. Clicking the transactions tab will show you the transaction record created. You can use the hyperlinked Loan ID or Borrower Name to quickly go to the Payments Loan Details page for the loan.


Unsuccessful imports:
The results tab will display the reason for the import working. Correct the incorrect records and try again. Note: It is possible to have an import with multiple records, some working and some failing. When you attempt to import the corrected records that failed, do not import records that succeeded. Only attempt re-importing records that failed.


